
How to Build a Backyard Fire Pit on a Budget
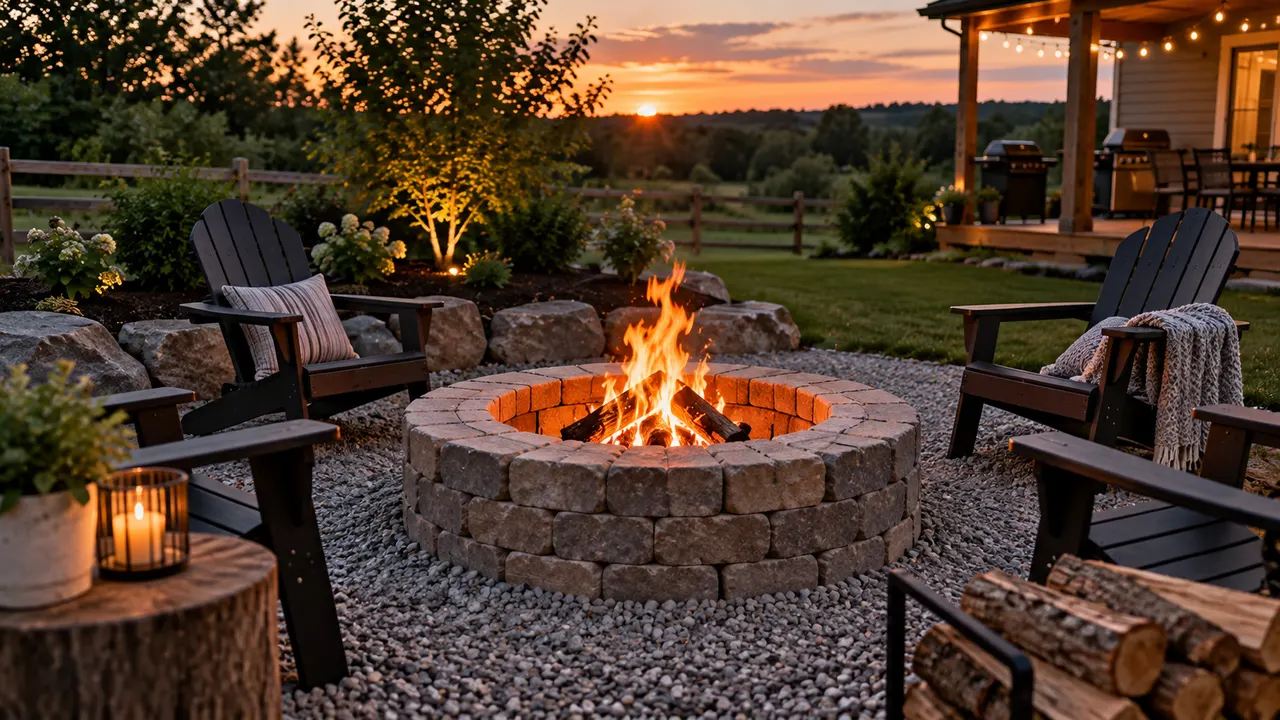
Check your local burn rules first, then build on a compacted gravel base at least 10 feet from your house and anything flammable, or farther if local code requires. A dry-stacked ring of retaining wall block lined with fire brick or a steel fire ring is the simplest budget build.
 By the Backyard with Ben teamUpdated · 10 min read
Quick answer
Check local burn rules and permit requirements first. Then choose a level spot at least 10 feet from structures, fences and overhanging branches (farther if your code says so), excavate and compact 4 to 6 inches of gravel, and dry-stack retaining wall block around a fire brick liner or steel fire ring, about 36 to 44 inches across inside.
To build a backyard fire pit on a budget, check your local burn rules, pick a spot at least 10 feet from your house and anything that can burn, lay a compacted gravel base, and dry-stack a ring of retaining wall block lined with fire brick or a steel fire ring. The build itself fits in a weekend with basic tools, and you don't need a contractor or a pricey kit.
Many guides skip the parts that matter most, like the base underneath and how far the pit needs to sit from your house. This one walks through a simple build using widely available materials, plus the sizing, clearance and local code questions you need to answer before you ever strike a match.
Key Takeaways
- Check with your local fire department or building department before you build. Burn ordinances and permit rules vary from town to town.
- Keep at least 10 feet of clearance from your house, fence, deck, shed and any overhanging branches, and more if local code requires it. Never build under a roof, pergola or tree canopy.
- Build on a compacted gravel base, never directly on grass, mulch or a wood deck.
- A 36 to 44 inch interior diameter is comfortable for most backyards and seating setups.
- Dry-stacked retaining wall block is usually the most budget-friendly material, and it needs no mortar.
- Line the inside with fire brick or a steel fire ring so regular block doesn't crack from direct heat.
Check Your Local Rules Before You Dig
This is the step people skip, and it's the one that can get an otherwise great project shut down after it's finished.
Most cities and counties regulate open burning in some way. Some require a permit for any permanent fire feature, some only allow contained fire pits with a spark screen, and some ban wood-burning fire pits in dense neighborhoods in favor of gas. Homeowners associations often add their own rules on size, placement and burning hours.
Burn bans are also common during dry seasons or drought, and they apply even if your fire pit meets every other rule. A pit that's fine to use in April might not be allowed to burn in August.
Look up your city or county's open burning ordinance, and if anything is unclear, call the non-emergency line for your local fire department. Before you excavate, call 811 so buried utility lines get marked.
When you call the fire department's non-emergency line, ask specifically about minimum clearance distance and whether a permit is required for a permanent pit versus a portable one. Portable metal fire pits are sometimes treated differently from permanent ones, so ask about both before you decide.
How Far Should a Fire Pit Be From Your House?
At least 10 feet from your house and any other structure, and farther if your local code requires it. Many codes set 15 to 25 feet for open recreational fires, so treat 10 feet as a bare minimum, not a target.
That clearance applies to your garage, fence, wood deck, shed, woodpile, vehicles and anything else that can burn, not just the house.
Look up, not just around. Low tree canopies, eaves, pergolas and covered patios are easy to miss when you're standing at ground level, but rising heat and a gust of wind can send sparks straight into whatever sits overhead. Never build a wood-burning pit under any roof or canopy.
Also think about wind direction and your neighbors. A pit that blows smoke at a neighbor's open windows most evenings will cause problems even if it's technically within code.
Decide Between In-Ground and Above-Ground
An in-ground fire pit is set into a hole dug below grade and lined with block or fire brick, so the top sits flush or just above the surrounding ground. It can look more built-in, but it holds water if you don't plan for drainage, and it's more work to dig, especially in clay or rocky soil.
An above-ground fire pit is built up from grade using a ring of retaining wall block, brick or pavers, like a short, round wall. It drains better, it's easier to get right on the first try, and because most budget builds use no mortar, you can often take it apart later.
For a first DIY fire pit, above-ground with dry-stacked block is usually the faster, cheaper and more forgiving choice.
What Size Should a Backyard Fire Pit Be?
An interior diameter of 36 to 44 inches works for most backyards. That's large enough for a real fire with a few logs, without throwing so much heat that seating has to sit far away.
For wall height, 12 to 14 inches above the surrounding grade is a comfortable range: tall enough to contain embers, low enough to see the fire from a normal patio chair. Leave at least 4 to 5 feet of open space between the outer edge of the pit and any seating, so chairs stay out of direct radiant heat and people can walk around easily.
| Measurement | Guideline |
|---|---|
| Clearance from house, fences, decks and sheds | At least 10 feet; often 15 to 25 feet under local code |
| Overhead clearance | Open sky: no branches, eaves, pergolas or roofs above |
| Interior diameter | 36 to 44 inches |
| Wall height above grade | 12 to 14 inches |
| Pit edge to seating | At least 4 to 5 feet |
| Base | 4 to 6 inches of compacted gravel plus about 1 inch of leveling sand |
Build a Base That Won't Shift or Burn
The base is invisible once you're done, but it determines whether the whole pit stays level and safe for years.
Clear grass, roots and topsoil down about 6 to 8 inches across the full footprint of the pit, plus a few extra inches around the outside edge. Never build directly on grass, mulch, root-filled soil or a wood deck. All of those can smolder, shift or catch a stray ember over time.
Fill the excavated area with 4 to 6 inches of compactable gravel (often sold as paver base) in 2-inch layers, tamping each layer before adding the next. A hand tamper works fine for a project this size.
Top that with about an inch of leveling sand, then check the surface with a long level before you set a single block. Every block you place will follow whatever the base does, so it's worth the extra time to get it flat now.
Choose Budget-Friendly Materials
You don't need natural stone or a specialty kit. Standard segmental retaining wall block from a hardware or landscape supply store is usually the most budget-friendly option, and it's designed to interlock without mortar.
The material choice that matters most for safety is the interior liner. Regular concrete pavers and retaining wall block aren't made for direct, sustained fire contact, and repeated high heat can make them crack or spall. Avoid river rock and other stones that may hold moisture, which can crack or burst when heated.
Line the inside of the pit with fire brick, or drop in a round steel fire ring, so the outer block never touches the flame. If you'd rather start with a steel ring or a portable pit, browse our fire pit picks.
Your total cost depends mostly on local material prices, the diameter you choose and how many courses of block you stack, so price out block, gravel, sand and liner at your local store before you start.
Assemble It Step by Step
With the base prepped, assembly moves fast, usually in an afternoon.
- Mark your circle using a stake and string as a compass, tracing the outer edge where the block will sit.
- Dry-fit the first course of block around the circle, adjusting gaps so the ring closes evenly.
- Check that the first course is level all the way around before moving on; this is your last easy chance to fix an uneven base.
- Stack additional courses, staggering the seams between rows for stability, until you reach your target wall height.
- Set the fire brick liner or steel fire ring inside the block wall.
- Fill any gap between the liner and the outer wall with sand or small gravel rather than leaving it hollow.
Most budget builds skip mortar and rely on the weight of the block to hold everything together, which also makes future repairs easier. Some builders add masonry adhesive between the top courses; follow the product label if you do.
Build Good Fire Safety Habits From Day One
A well-built fire pit still depends on how you use it.
Keep a spark screen on hand, and keep a charged garden hose, a bucket of water or a fire extinguisher within reach every time you light a fire. Never leave a fire unattended, even for a quick trip inside, and keep kids and pets at a safe distance.
Burn only dry, seasoned firewood. Don't burn trash, yard waste, painted or treated lumber, and never use gasoline or other accelerants to start or revive a fire. Check wind conditions and any active burn ban before lighting up.
Let ashes cool completely, then move them into a metal container with a tight lid, not a plastic bin or the regular trash. Coals can stay hot enough to reignite for hours or even days after a fire looks out. Once your pit is done, ideas like these backyard staycation ideas can help you build a seating area around it.
A Budget Fire Pit Can Still Be a Safe, Solid Build
Learning how to build a backyard fire pit doesn't require a big budget or advanced skills. It requires a level gravel base, real clearance from anything that can burn, a liner that can handle the heat, and a check of your local rules before you start.
Get those fundamentals right and a simple backyard fire pit will give you years of evenings outside without turning into a safety problem or a code violation. If you're looking for more projects with a similar payoff, see our list of weekend backyard projects that look expensive.
Frequently Asked Questions
Do I need a permit to build a fire pit in my backyard?
It depends on your city or county. Some places require a permit for a permanent fire pit but not a portable one, and some restrict or ban wood-burning pits in dense neighborhoods. Check your local ordinance or call the fire department's non-emergency line before you build.
What is the best base for a fire pit?
A base of 4 to 6 inches of compacted gravel, topped with about an inch of leveling sand, is a reliable, budget-friendly choice. It drains well, resists shifting, and won't burn or smolder the way grass, mulch or root-filled soil can.
Can I build a fire pit on grass or a wood deck?
No. Grass, mulch and wood decking can smolder or ignite from heat and stray embers, even if the fire itself stays contained. Always build on a non-flammable base like compacted gravel or a concrete slab, and never on a wood deck.
Can I use regular bricks or river rocks for a fire pit?
Not for the part that touches the fire. Regular bricks, pavers and block can crack from sustained heat, and river rocks can trap moisture that makes them crack or burst. Use them only for the outer wall and line the inside with fire brick or a steel fire ring.
What should you not burn in a backyard fire pit?
Skip trash, yard waste, painted or pressure-treated wood and anything plastic, and never use gasoline or lighter fluid on a wood fire. Dry, seasoned firewood burns cleaner, makes less smoke and is less likely to throw sparks.
Published · Last updated . Written by the Backyard with Ben team from standard, widely published guidance. About us.
As an Amazon Associate we earn from qualifying purchases. Disclosure
Shop for this guide
Sunnydaze Crossweave 36" Wood-Burning Fire Pit
Why we pick it: 4.5★ from 4,400+ reviews. A large round fire pit with a decorative crossweave design.
Check price on AmazonCheck priceSolo Stove Bonfire 19.5" Smokeless Fire Pit with Stand
Why we pick it: 4.8★ from 2,000+ reviews. A low-smoke stainless design, with a stand included to protect the surface below.
Check price on AmazonCheck price36" Round Fire Pit Spark Screen with Poker
Why we pick it: 4.5★ from 700+ reviews. Keeps sparks in. Sized for 36" fire pits.
Check price on AmazonCheck priceMore for your backyard
Gear up with our top-rated tool picks, shop the look if you'd rather buy than build, or read a related guide. See all DIY Projects guides.
Related guides
 AI-generatedDIY Projects
10 Easy DIY Backyard Upgrades You Can Finish in a Weekend
The easiest DIY backyard upgrades are quick, beginner-friendly jobs like hanging string lights, painting old planters, edging the lawn and refreshing mulch. Each takes a few hours with basic tools, so you can finish two or three in one weekend.
 AI-generatedDIY Projects
7 Weekend Backyard Projects That Look Expensive but Aren't
The weekend backyard projects that look most expensive are real builds: a horizontal slat fence section, a gravel or paver path, a pergola kit, a fire pit ring, solar path lights, a fresh deck stain and a trellis wall. Most take one or two days with basic tools.
 AI-generatedOutdoor Living
10 Backyard Staycation Ideas That Feel Like a Vacation
The best backyard staycation ideas give you a place to settle in: a comfortable lounge zone, shade, water, a fire feature, warm layered lighting and a few sensory touches. Start with two or three that fit your space and budget.